Travel Photo Metadata Workflow
This document is the dedicated specification for travel album pages in this repo. It has two goals:
- Make travel photos stably display a subtle one-line metadata strip in the lightbox
- Make it repeatable: give AI a Markdown file full of image links and have it produce a complete travel album page
If you continue adding new travel pages to docs/Travel, default to this document.
Understanding the Current Implementation
The current travel photo metadata pipeline in this repo works like this:
- You prepare photos with valid EXIF data.
- Photos are converted to web-friendly JPEG and uploaded to stable paths under
https://oss.nevergpdzy.com/. - In
docs/Travel/*.mdx, photos are referenced by domain-relative paths usingcreateTravelPhotos([...]). - Running
npm run verify:travel(which internally runsnpm run generate:travelthennpm run build). - The script
scripts/generate-travel-photo-metadata.mjsdownloads the JPEGs by these relative paths, reads EXIF / GPS, and calls AMap reverse geocoding when GPS is present. It generatessrc/data/travelPhotoMetadata.generated.json. - The script
scripts/generate-travel-map-data.mjsaggregates article places and per-photo GPS points by theTravelGalleryorder indocs/Travel/*.mdx. It generatessrc/data/travelMap.generated.json. src/components/TravelGallery/index.jsreads the photo metadata.src/components/TravelMap/*reads the map data, rendering the place overview map on the Travel category page and the capture point map on article pages.
If the Travel map shows issues like "all markers shifted to the other side of the road," start here:
The lightbox currently prioritizes these fields:
| Field | Source | Displayed |
|---|---|---|
displayLocation | Prefer GPS + AMap reverse geocoding simplified result; falls back to locationLabel when no GPS or request fails | Yes |
capturedAt | EXIF DateTimeOriginal; falls back to DateTime | Yes |
device | EXIF Make + Model | Yes |
lens | EXIF LensModel; iPhone names are normalized to short labels | Yes |
locationLabel | Inherited from the travel article title; serves as fallback location when GPS is missing or the request fails | Not directly prioritized |
gps / reverseGeocode | Normalized cache of EXIF GPS and AMap reverse geocoding results | Not directly displayed |
Additionally, hasMetadata is generated to flag whether at least some usable metadata was extracted for a given image.
Key Facts to Remember
1. Displayed Location Prefers Reverse Geocoding; Title Is the Fallback
The location text displayed on the page comes from the photo GPS via AMap reverse geocoding simplified result, not from the article title by default. Only under these conditions does it fall back to the title in the article front matter:
- The photo has no usable GPS
- The reverse geocoding request failed
- The reverse geocoding succeeded but returned no readable landmark name or administrative district combination
For example:
---
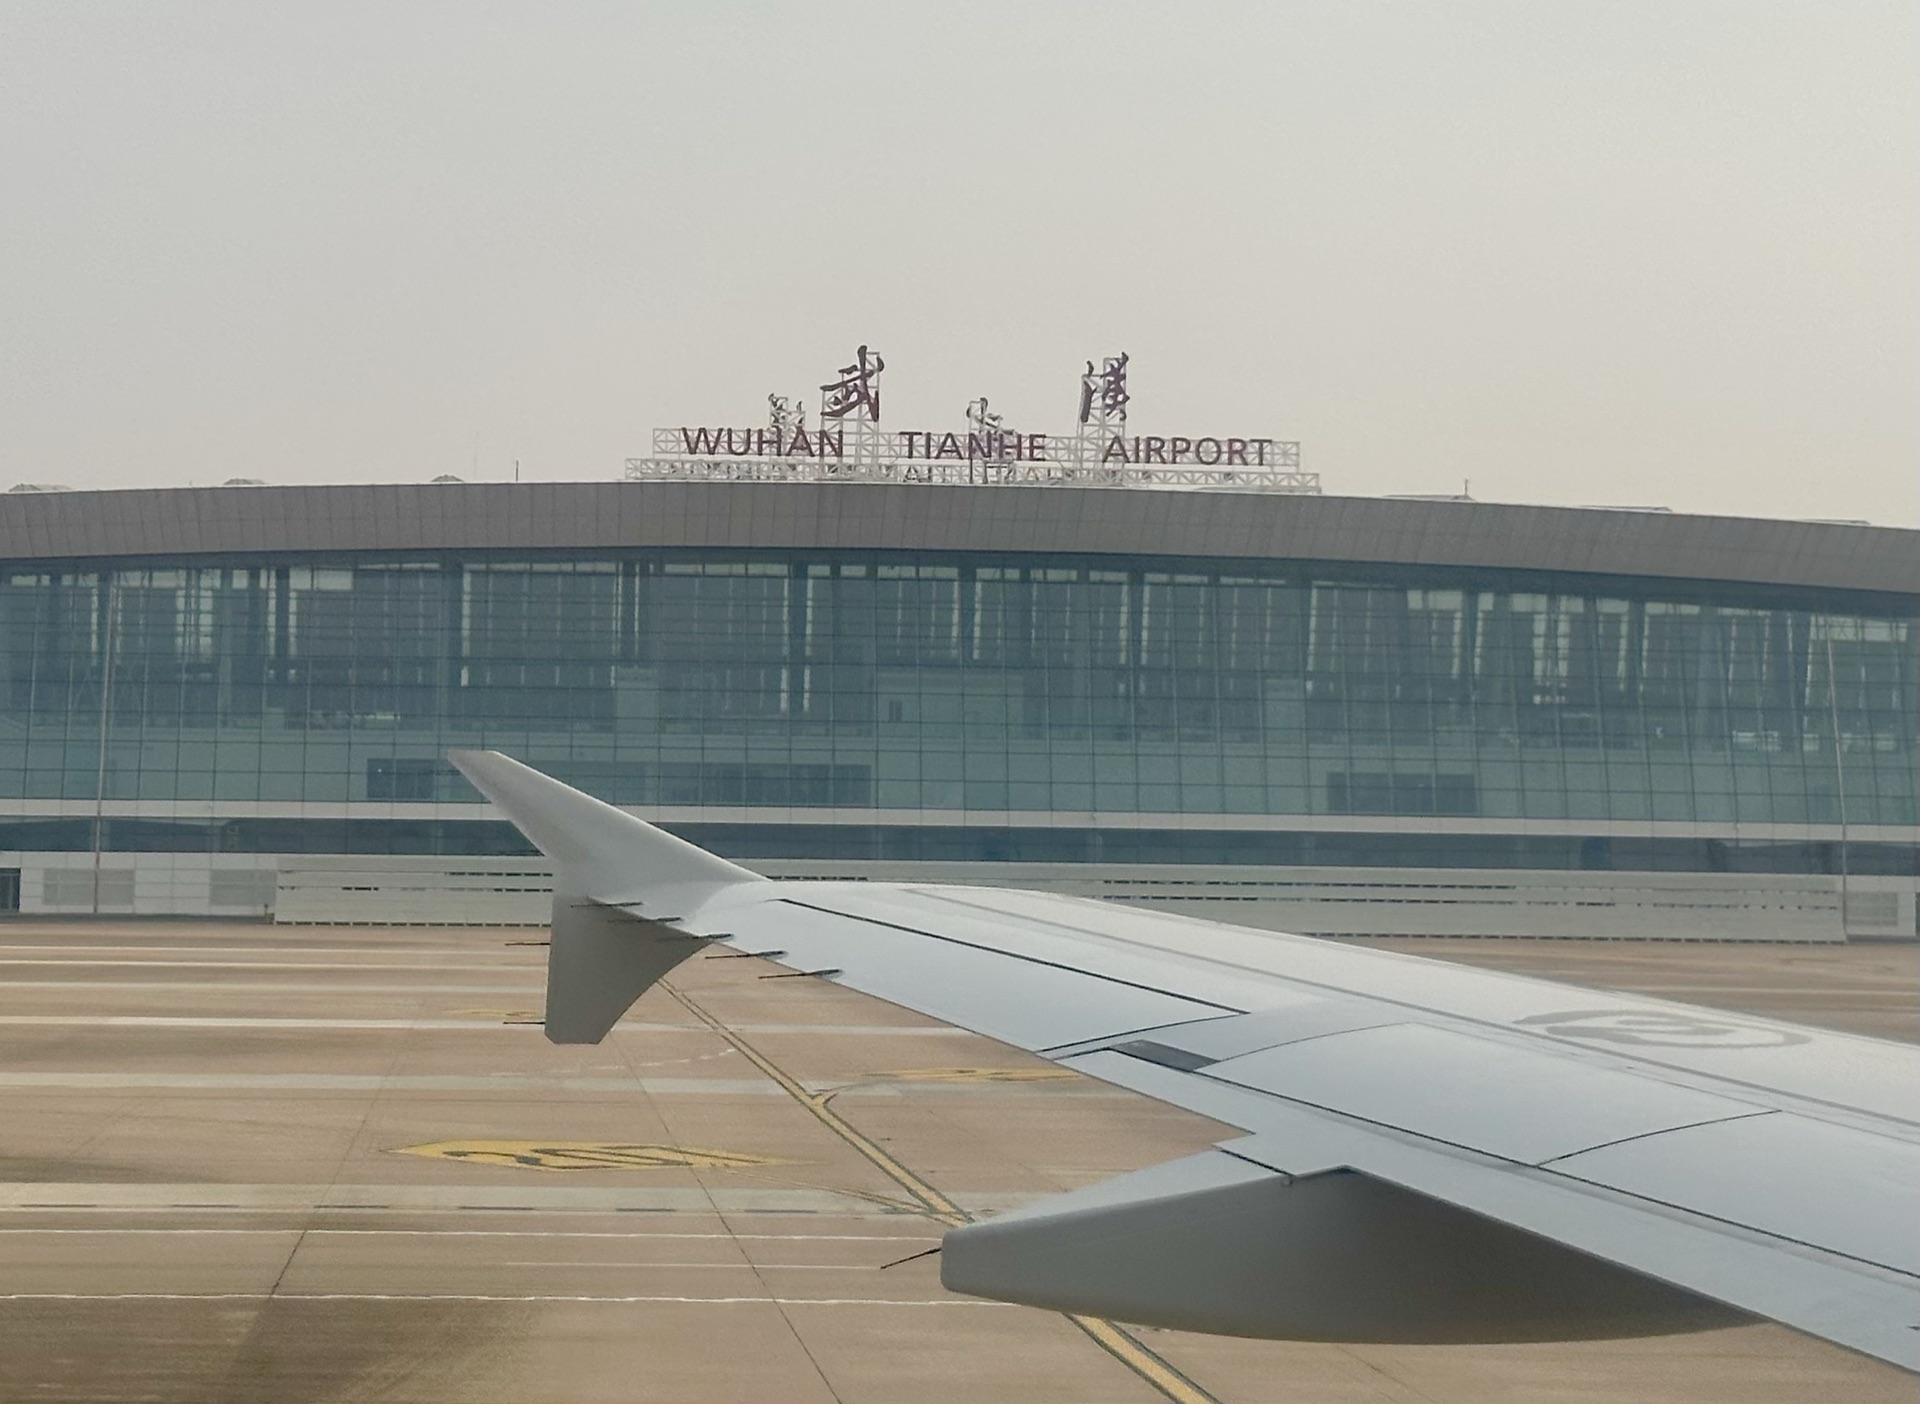
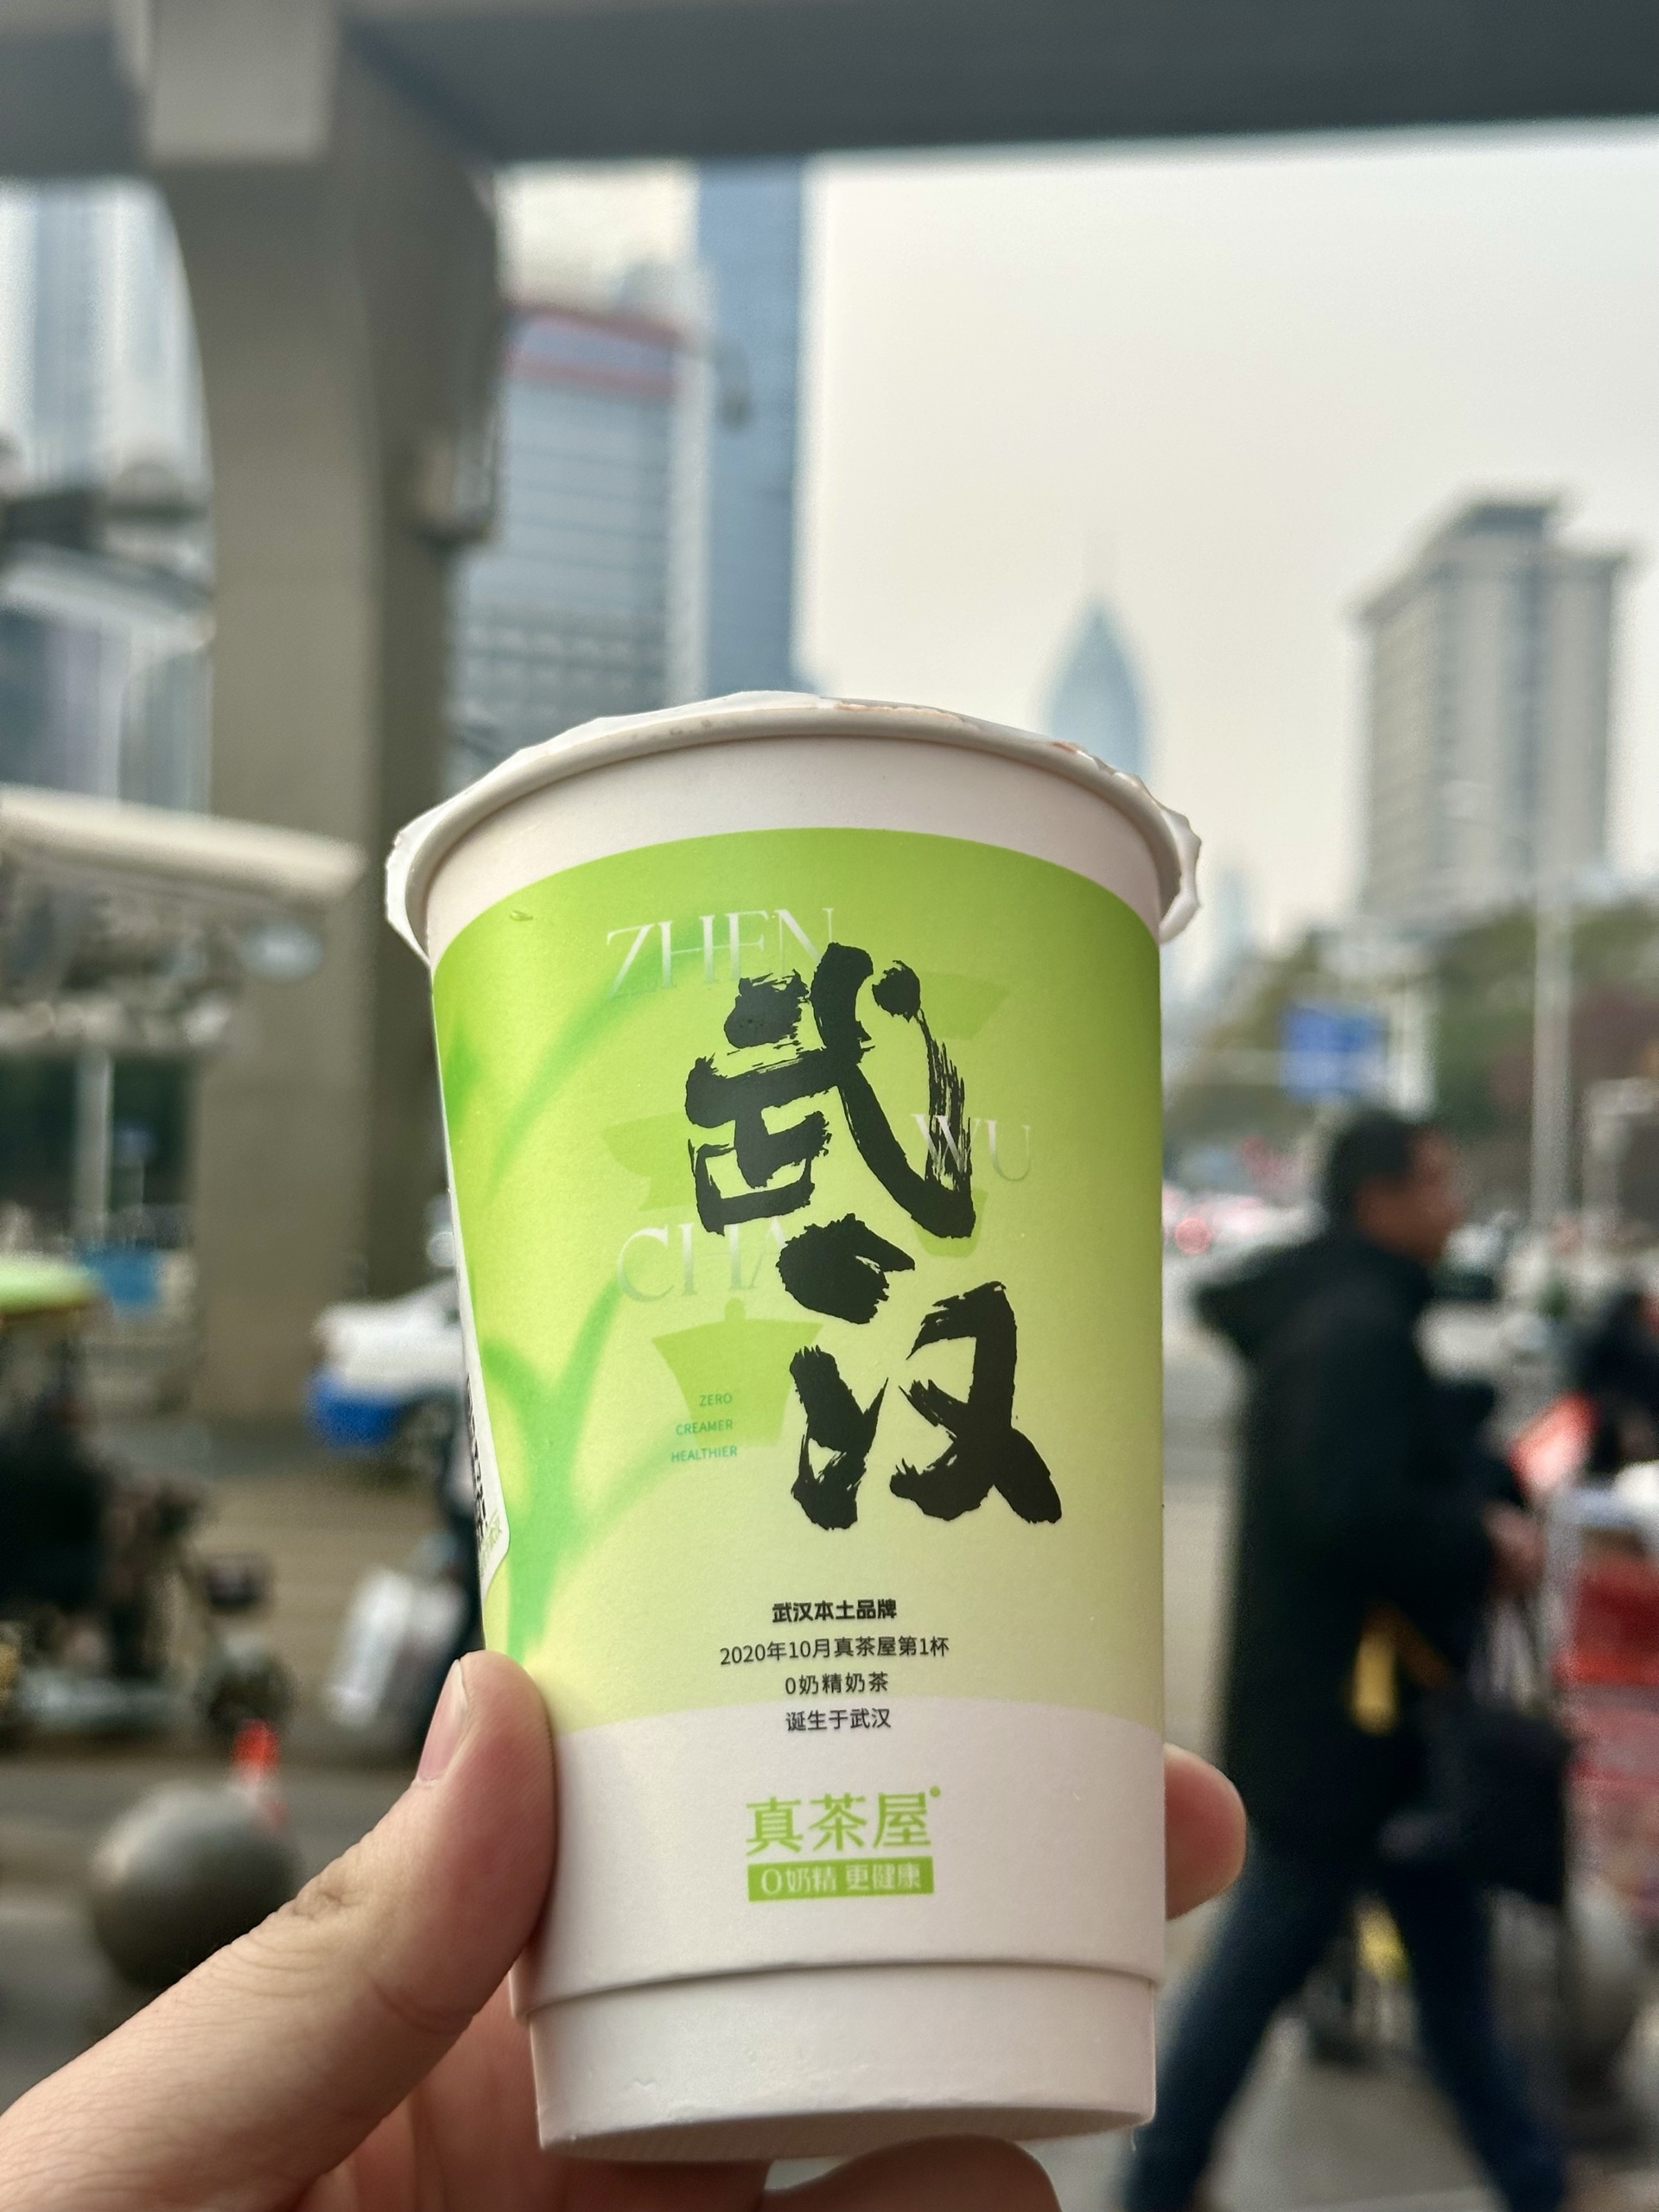
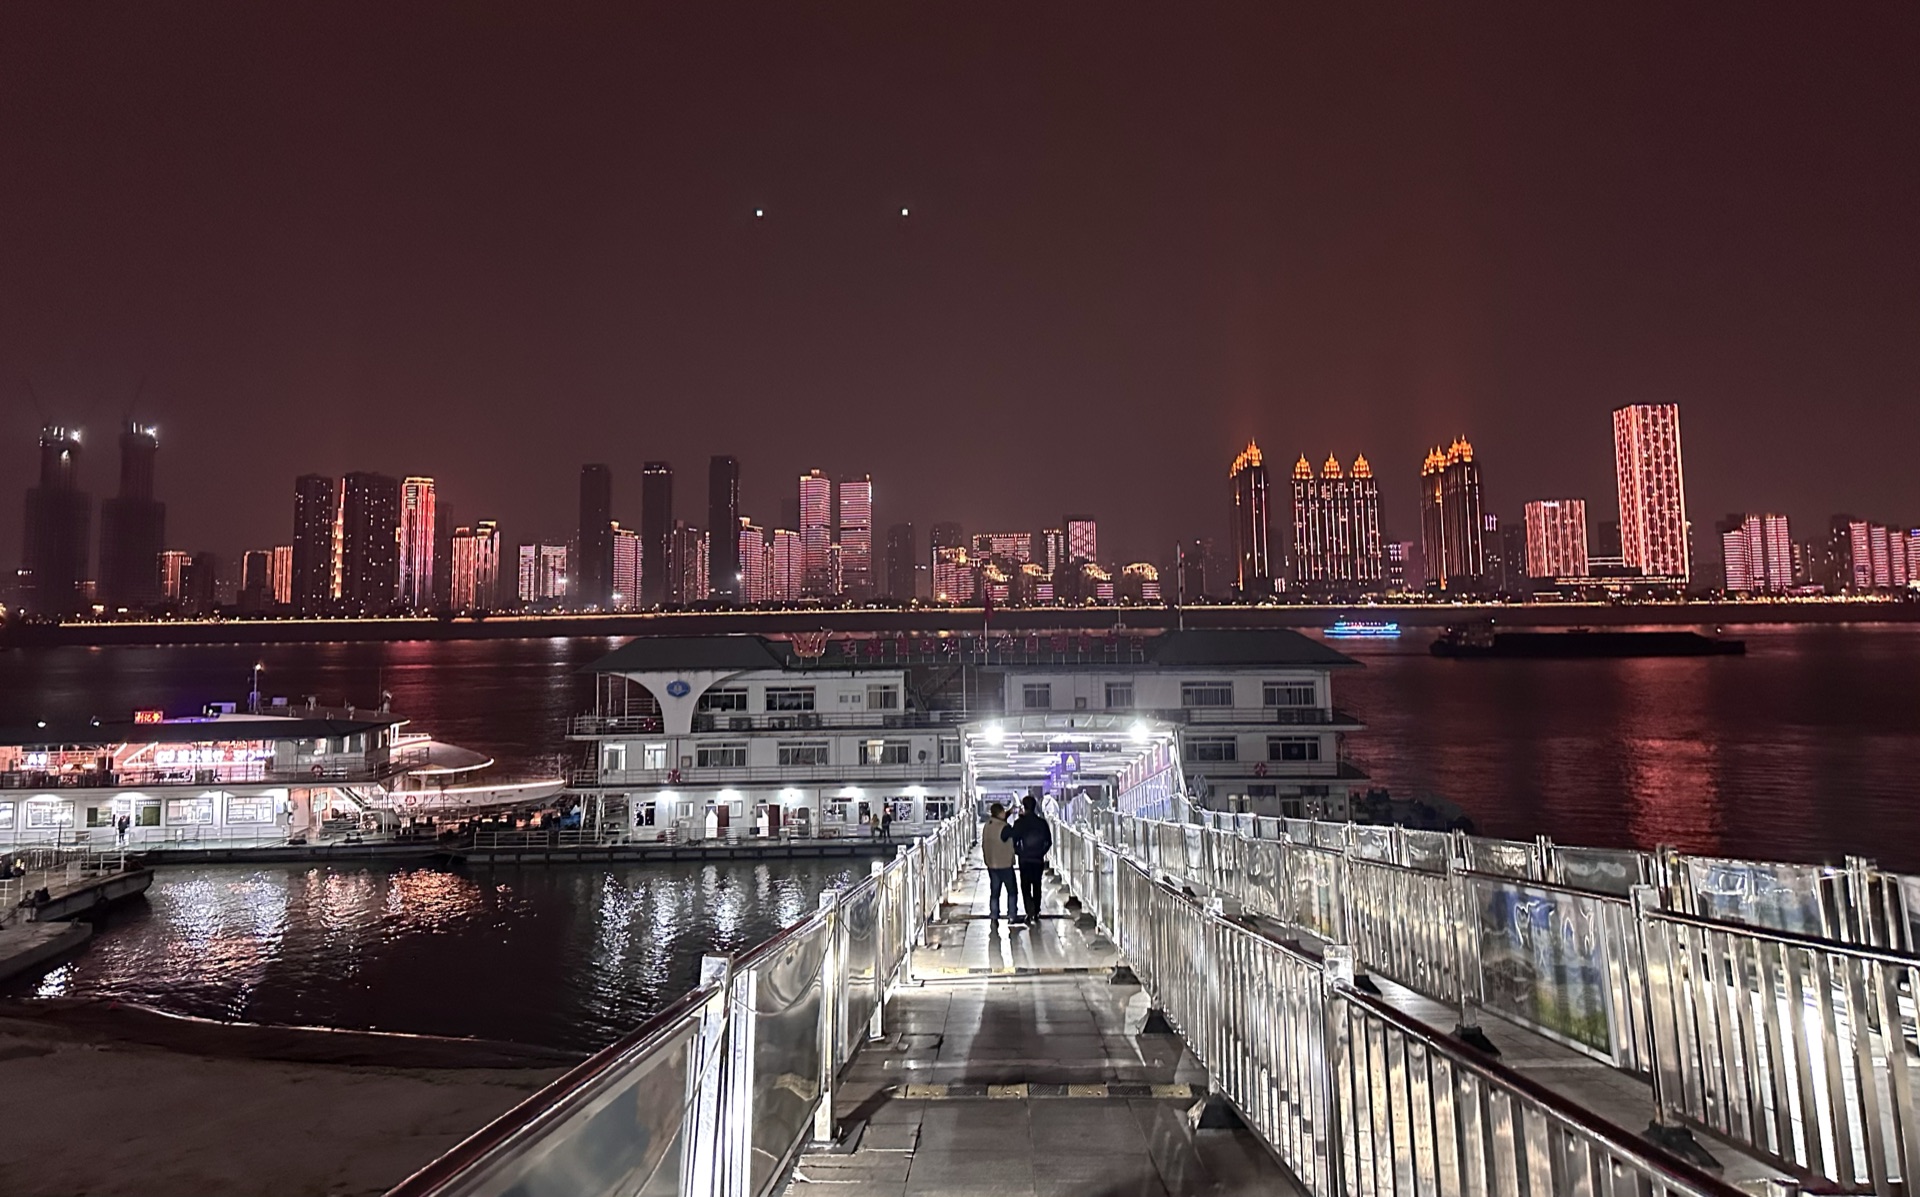
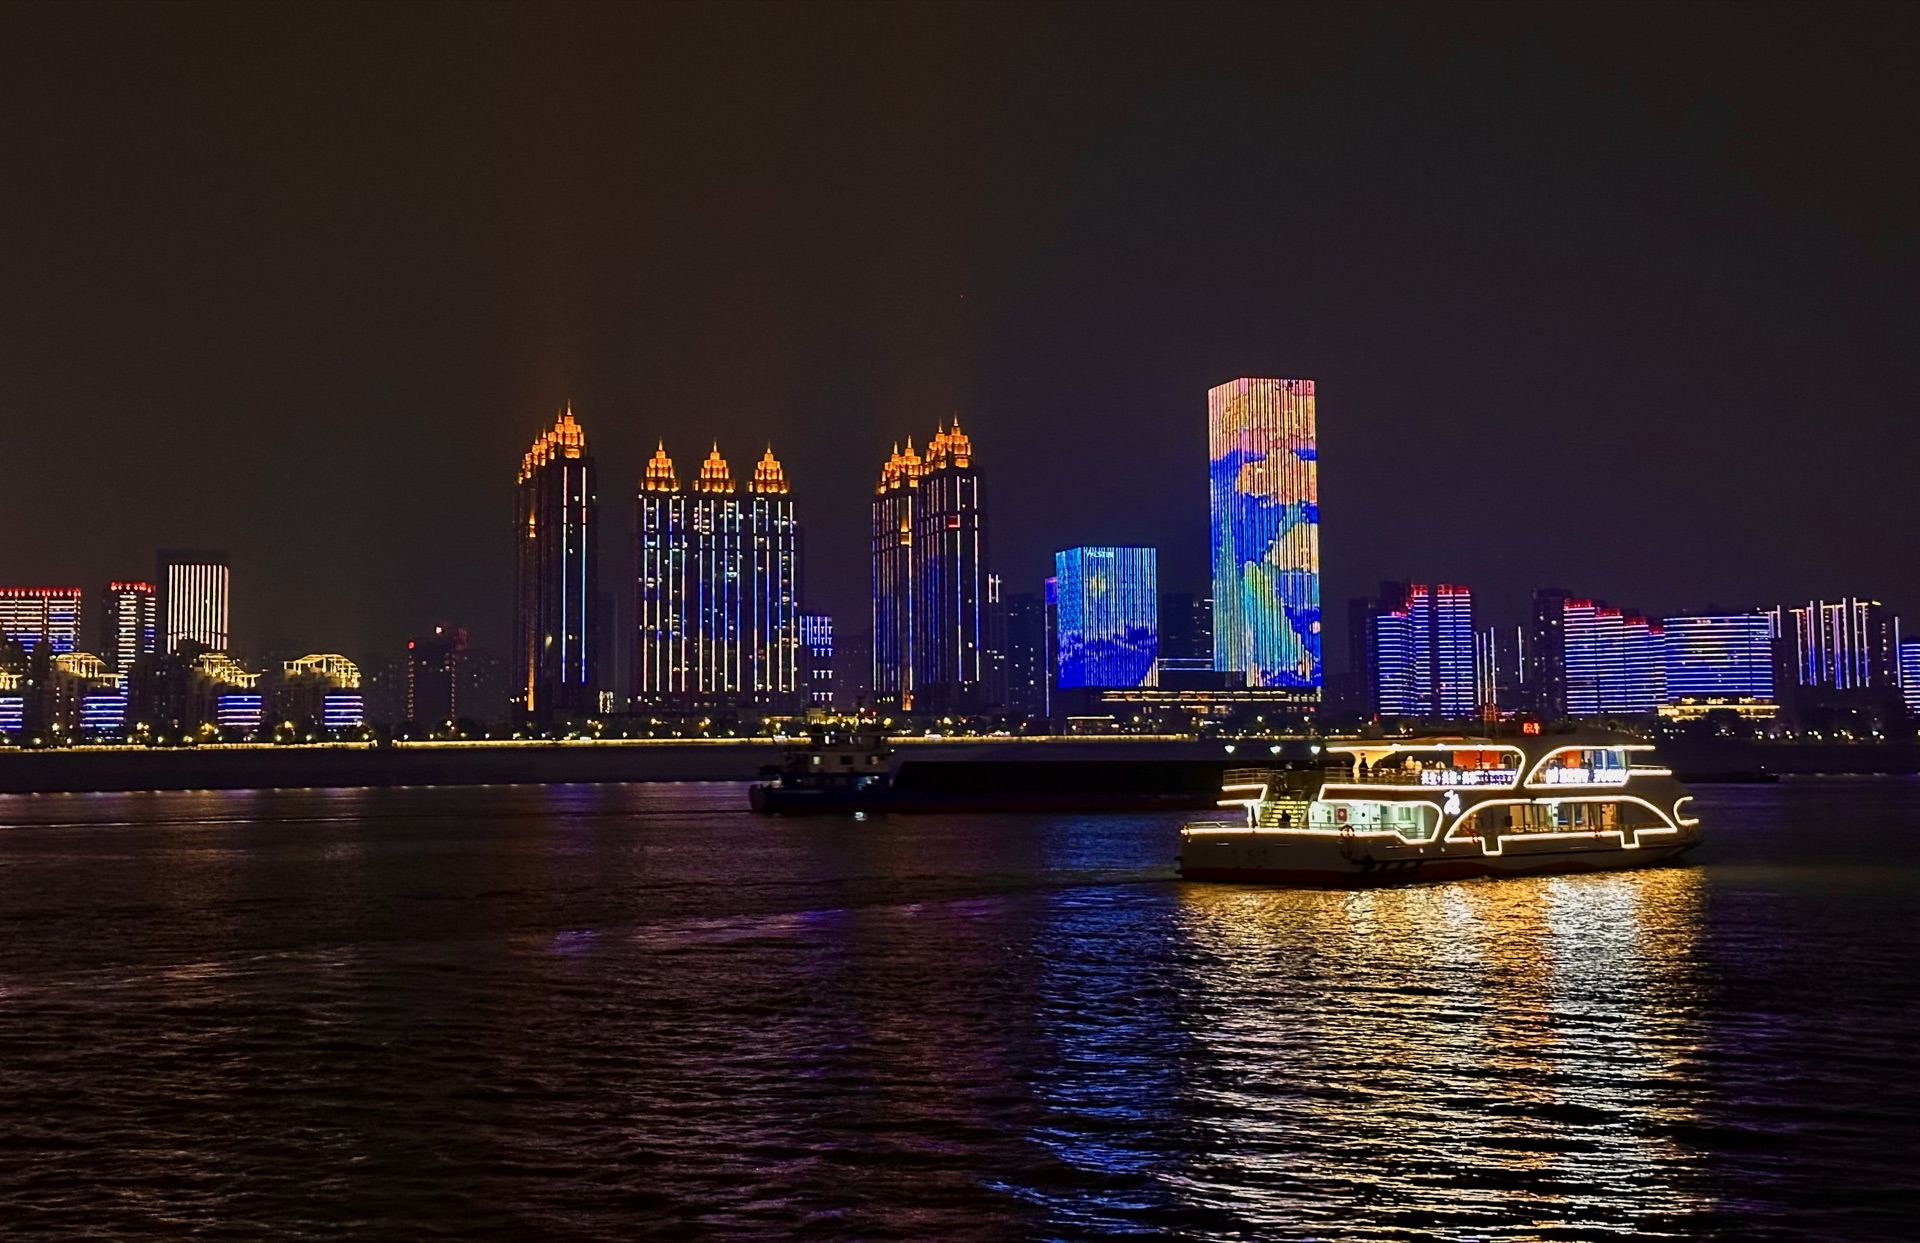
title: Wuhan
---
The lightbox will display Wuhan.
Another example:
---
title: Huanglong and Jiuzhai Valley
---
The lightbox will display Huanglong and Jiuzhai Valley.
So if you want the location display to be correct, the most important thing is to write the travel article title correctly -- do not expect photo GPS to determine the frontend copy.
2. The Metadata Script Only Processes JPEG; Standard Input Is Domain-Relative Paths
The current script recognizes .jpg / .jpeg image references. The standard syntax is a domain-relative path, for example:
img_for_Typora/IMG_5867_WuHan.jpg
JingXi/IMG_5867_WuHan.jpg
Travel/Jinan/IMG_6319_Jinan.jpg
This means:
- Travel pages should reference JPEG files
- New articles should prefer domain-relative paths instead of bare filenames
- If your originals are
HEIC/HEIF, convert to JPEG first
For backward compatibility with legacy articles, the component still accepts bare filenames, but it will automatically interpret:
IMG_5867_WuHan.jpg
as:
img_for_Typora/IMG_5867_WuHan.jpg
This is a compatibility rule, not a new recommended convention.
For HEIF-to-JPEG conversion commands, continue referring to:
3. iPhone Lens Names Are Compressed to Short Labels
The current frontend and generation scripts both normalize iPhone lens names to short labels. The final output retains only these:
Ultra WideMainTelephotoFront
If the device is not an iPhone, or the lens model does not match these rules, the original lens field is preserved.
Pre-Upload Preparation Guide
If you want AI to correctly carry photo metadata going forward, satisfy these prerequisites before uploading.
1. Preserve the "Original Pipeline" for Source Photos
Priority recommendation:
- Phone or camera originals
- AirDrop / cable export / "Export Unmodified Originals" from the photo library
- Batch conversions that explicitly preserve EXIF
- Last resort: any social app, chat app, or web intermediary
Do not use these as final publish sources:
- Images forwarded through WeChat, QQ, Weibo, Xiaohongshu, or other social platforms
- Images "saved as" from chat windows
- Downloaded images already re-compressed by a website
- Output from online compression tools
These paths are most likely to strip DateTimeOriginal, Model, LensModel, GPS, and other information entirely.
2. Prefer One Location Title Per Travel Article
Because locationLabel is still inherited from the article title and now serves as the "fallback location when GPS is missing," each docs/Travel/*.mdx should describe one primary location. Otherwise:
- The page title becomes vague
- Every image in the lightbox displays the same location name
- Photos without GPS all uniformly fall back to that title location
3. Keep Filenames Stable, Readable, and Decided Once
Most travel photo filenames in the current repo look like:
IMG_5867_WuHan.jpg
IMG_7107_HongKong.jpg
IMG_0248_JiuzhaiValley.jpg
Continue this style:
- Keep the original camera sequence number
- Append a location identifier in English to the suffix
- Do not repeatedly rename after uploading
Once a filename changes, you must also update:
- The remote image URL
- The reference in
docs/Travel/*.mdx - Regenerate the metadata manifest
If you use multi-level directories, the path itself must be stable. For example:
img_for_Typora/IMG_5867_WuHan.jpg
Travel/Jinan/IMG_6319_Jinan.jpg
4. Image Links Should Already Be Stable Public URLs
If you give AI "a Markdown file full of image links," those links should ideally:
- Open directly in a browser
- Be stable URLs without temporary auth parameters
- Land under the
https://oss.nevergpdzy.com/domain - Have a
.jpgor.jpegfile extension
If you provide temporary links, short links, redirect chains, or cloud storage auth links, AI can modify the document, but the metadata script may not be able to stably fetch the final file.
How to Check Whether Photos Have Lost Valid Metadata Before Upload
For this repo, "valid metadata" means at least some of the following still exist:
- Capture time
DateTimeOriginal - Device model
Model - Lens model
LensModel - Optional GPS information
If all these fields are gone, the lightbox typically shows only the location or no photography information at all.
Obvious Red Flags First
If an image shows any of these signs, suspect it is no longer the original EXIF-bearing version:
- File size is abnormally small -- only a few hundred KB for what should be a phone original
- Resolution is compressed to a fixed long edge, like 1280, 1600, 2048, etc.
- Capture time, device model, and lens model are all missing
- Within the same set of photos, only a very few still carry device info
- You had location services on, but all photos have zero GPS
If you shot with an iPhone and your JPEGs have universally become "noticeably smaller + uniformly compressed dimensions + EXIF essentially empty," they are almost certainly a version processed by an intermediary platform.
Recommended Method: exiftool
If your machine has exiftool installed, use it first. It is best for checking "how much metadata remains."
Check a single image:
exiftool -DateTimeOriginal -Model -LensModel -GPSLatitude -GPSLongitude -ImageWidth -ImageHeight IMG_0001.jpg
To also check for post-processing software traces, add Software:
exiftool -DateTimeOriginal -Model -LensModel -GPSLatitude -GPSLongitude -Software IMG_0001.jpg
The ideal state is:
DateTimeOriginalhas a valueModelhas a valueLensModelhas a value- If location services were on,
GPSLatitude/GPSLongitudealso have values
If only pixel dimensions remain and capture time, device, and lens are all gone, do not use this image for travel metadata display.
Windows Check Without Extra Tools
If you do not have exiftool, use PowerShell to read the key EXIF fields directly:
Add-Type -AssemblyName System.Drawing

function Read-ExifAscii($image, $id) {
  $prop = $image.PropertyItems | Where-Object Id -eq $id | Select-Object -First 1
  if (-not $prop) {
    return $null
  }

  return ([System.Text.Encoding]::ASCII.GetString($prop.Value)).Trim([char]0)
}

$path = (Resolve-Path .\IMG_0001.jpg).Path
$image = [System.Drawing.Image]::FromFile($path)

[pscustomobject]@{
  DateTimeOriginal = Read-ExifAscii $image 0x9003
  Model            = Read-ExifAscii $image 0x0110
  LensModel        = Read-ExifAscii $image 0xA434
  Width            = $image.Width
  Height           = $image.Height
}

$image.Dispose()
How to judge the results:
DateTimeOriginalhas a value: capture time is likely still intactModelhas a value: device info is still intactLensModelhas a value: lens info is likely still intact- All three are empty: this JPEG's critical EXIF has almost certainly been stripped
macOS Check Without Extra Tools
macOS can use the built-in mdls for a quick screening:
mdls -name kMDItemContentCreationDate \
     -name kMDItemAcquisitionMake \
     -name kMDItemAcquisitionModel \
     -name kMDItemPixelWidth \
     -name kMDItemPixelHeight \
     IMG_0001.jpg
If capture time and device model are completely invisible here, the image is likely unsuitable as a travel metadata source.
Keep in mind:
mdlsis better for quick screening- For lens and GPS and other more complete EXIF,
exiftoolis more reliable
GUI First-Round Check
If you do not want to run commands first, you can also check via the system UI:
- Windows: right-click the image, open "Properties -> Details"
- macOS: select the file, press Space for preview or "Get Info"
If capture date, device, dimensions, and other info are completely invisible here, there is no point expecting the repo scripts to extract complete data from this image.
Recommended Complete Workflow for This Repo
This workflow is suitable for continuing to add new travel pages.
Step 1: Prepare Photos
Requirements:
- Preserve EXIF as much as possible
- Final format must be JPEG
- Filename and path must be stable
- Images already uploaded to a stable URL under
https://oss.nevergpdzy.com/ - Do not use the retired picture domain; normalize old source lists to
https://oss.nevergpdzy.com/before they enter the Travel workflow
If the original format is HEIC, first refer to Apple HEIF Photo Display Guide to convert to JPEG before proceeding.
Step 2: Prepare Markdown for AI
If you want AI to stably take over in the future, write the source Markdown as "title + sections + image links per section." For example:
# Wuhan
## Arrival
## Streets
This way AI can directly map each section to a createTravelPhotos([...]) array.
If you provide a single block of Markdown with no headings and only image URLs, AI can handle it, but it will only guess groupings from image order, paths, and filenames -- the result will be less stable than explicit sections.
If AI needs to look at photos first to decide grouping, headings, or body text, do not read originals directly by default:
- Generate compressed previews first for AI to read
- Reading originals directly easily triggers conversation context size limits; the empirical risk threshold is around
20MB - Default first-tier preview uses a long edge of
1280px - If
1280pxis still unclear for small text, signs, menus, receipts, or key details, step up to a long edge of1920px - For multi-image tasks, compress and read in batches -- do not feed the entire set of originals at once
- Compressed previews are only for AI to understand scenes, groupings, and write copy -- not for EXIF checks or metadata generation
Your Most Common Collaboration Style: Location + Image Links + A Few Sentences
If you do not first write a complete Markdown yourself but instead give AI these pieces:
- The location name for this trip
- A batch of already-uploaded OSS image links
- A few short subjective descriptions For example: "this trip leans toward seaside and night scenes," "first half is arrival and streets, second half is night scenes and return," "keep the writing restrained, not like a travel guide"
That works perfectly with the current repo's standard pipeline.
Recommended minimum input:
- Location name
Example:
Jinan - Stable, accessible JPEG OSS links
Preferably all under
https://oss.nevergpdzy.com/ - At least 2 to 5 sentences of your own feelings, order hints, or style requirements
For example:
- What scenes to emphasize
- Roughly what order to view the photos
- Whether the tone should be calm, narrative, or diary-like
- Which photos must be standalone sections, which can be grouped
When AI takes over, it should follow this order:
- First check whether the links are stable and accessible, and whether they are JPEG.
- If there are only links and no groupings, do an initial grouping by file order, scene changes, and your descriptions.
- If groupings are still uncertain, read compressed previews -- only to judge scenes and write body text, not to read the entire set of originals.
- First produce a "source Markdown draft," organizing headings,
##sections, body paragraphs, and image links. - Then hand this source draft to
scripts/create-travel-article.mjsto convert into the finaldocs/Travel/<slug>.mdx. - After generation, refresh photo metadata, map data, and run build verification.
- If any images lack valid EXIF, lack GPS, have broken links, or the location naming is clearly unstable, explicitly tell the user.
In other words, AI should not hand-write the final MDX directly. A more reliable approach:
- First produce a source draft that a human can also read
- Then use the script to generate the final MDX
- Then run verification
This way, when you later want to revise copy, adjust groupings, add or remove images, you can reuse the same pipeline without regressing to one-off manual page assembly.
An input template that best fits your current habits:
Location: Jinan

Requirements:
- Don't write it like a travel guide; lean toward album narration
- First half is arrival and springs, second half is night scenes
- Tone: restrained, not too lyrical

Images:
https://oss.nevergpdzy.com/Travel/Jinan/IMG_6319_Jinan.jpg
https://oss.nevergpdzy.com/Travel/Jinan/IMG_6352_Jinan.jpg
https://oss.nevergpdzy.com/Travel/Jinan/IMG_6376_Jinan.jpg
https://oss.nevergpdzy.com/Travel/Jinan/IMG_6386_Jinan.jpg
When AI receives this kind of input, the standard output should be:
- First produce a source draft like
drafts/travel/<slug>-source.md - Then run:
npm run create:travel-article -- --source drafts/travel/<slug>-source.md --verify
This command generates the final docs/Travel/<slug>.mdx, then refreshes Travel photo metadata, map data, and builds the site. It is equivalent to generating the article then running npm run verify:travel.
- Finally report back to the user, including:
- The path of the newly generated Travel page
- Whether metadata and map refresh succeeded
- Whether the build passed
- Which images are missing EXIF / GPS / reverse geocoding
Step 3: AI Converts Markdown into a Travel Page in This Repo
When AI takes over in this repo, it should follow these rules.
1. Page Location
New articles go to:
docs/Travel/<slug>.mdx
2. Front Matter
Must have at minimum:
---
title: Wuhan
description: A short summary of this travel album.
sidebar_position: -20241218
hide_table_of_contents: true
---
Where:
titleaffects the location name displayed in the lightbox- If you want the location to display in Chinese, the Chinese location must come first in the title
sidebar_positionuses the negative of the trip start date in-YYYYMMDDformat, used to sort Travel cards, sidebar, and prev/next navigation with the newest trip first
Do not write sidebar_position as a plain sequence number like 1, 2, 3..., or you will need to renumber everything when adding a newer trip later. Do not rename Travel files for sorting; the current map data and homepage cards still use the file basename as the article id.
For multiple articles on the same day needing fine-tuned order, use decimal suffixes:
sidebar_position: -20260430.02
sidebar_position: -20260430.01
Do not write appended integer-digit values like -2026043001, as it will be much smaller than a normal date and cause the article to permanently rank in the wrong position.
3. Component Imports
At the top of the page, uniformly use:
import TravelGallery, {createTravelPhotos} from '@site/src/components/TravelGallery';
4. Image Array Syntax
Image arrays should use domain-relative paths. Do not write full URLs into createTravelPhotos([...]):
export const arrivalPhotos = createTravelPhotos([
  'img_for_Typora/IMG_5867_WuHan.jpg',
  'img_for_Typora/IMG_6001_WuHan.jpg',
]);
The reasons:
- This syntax reliably supports multi-directory structures
- The metadata script currently works around the "relative path -> download -> parse EXIF" pipeline
- If different directories contain same-named images, relative paths avoid conflicts
5. Grouping Rules
When AI processes user-uploaded Markdown, prioritize grouping by this order:
- Group by the source Markdown's H2 or H3 headings
- If no headings, group by obvious scene paragraphs
- If still no information, split by original order into 2 to 4 groups
6. Preserve Image Order
Do not adjust the order of images within a group by default. Because:
- Capture time is, in most cases, already sequential
- The user has usually already arranged them once for browsing narrative
7. Relationship Between Copy and Images
The metadata below images displays automatically, so AI does not need to manually write capture time, device, or lens into the body text.
The body text is better suited for:
- Travel narration
- Scene transitions
- Rhythm descriptions between image groups
8. Recommended Minimal MDX Template
---
title: Wuhan
description: A short album-style record of a brief stay in Wuhan, slowing down to take it in.
sidebar_position: -20241218
hide_table_of_contents: true
---

import TravelGallery, {createTravelPhotos} from '@site/src/components/TravelGallery';

export const arrivalPhotos = createTravelPhotos([
  'img_for_Typora/IMG_5867_WuHan.jpg',
  'img_for_Typora/IMG_6001_WuHan.jpg',
]);

export const streetPhotos = createTravelPhotos([
  'img_for_Typora/IMG_6069_WuHan.jpg',
  'img_for_Typora/IMG_6076_WuHan.jpg',
]);

Opening text goes here.

<TravelGallery images={arrivalPhotos} />

## Slowing Down the Pace

Second paragraph text goes here.

<TravelGallery images={streetPhotos} />
Step 4: Generate the Metadata Manifest
First configure a local environment variable file in the repo root once:
3.5 Auto-Generation from Raw Markdown / OSS Links to Travel MDX
If you have a plain Markdown source draft with body text, ## sections, and image OSS links under https://oss.nevergpdzy.com/, run:
npm run create:travel-article -- --source drafts/travel/jinan-source.md
If you want to also refresh photo metadata and map data after generating docs/Travel/*.mdx:
npm run sync:travel-article -- --source drafts/travel/jinan-source.md
The script will automatically:
- Read front matter
- Derive the output filename from
slug,file_name,fileName,title, or the source filename; front matteroutputcan also explicitly specify the output path - Preserve
##section structure - Extract JPEG image links under
oss.nevergpdzy.comand convert to domain-relative paths - Generate
createTravelPhotos([...]) - Inject
TravelStoryMapandTravelGallery - Output the final
docs/Travel/<slug>.mdx
scripts/create-travel-article.mjs preserves the sidebar_position from the source draft's front matter. So the source template should have sidebar_position: -YYYYMMDD written in advance -- do not wait to manually add it after generating the MDX.
Several parameter boundaries to remember:
--sourceor-sis required and points to the source Markdown.--syncrunsnpm run generate:travelafter writing the final MDX.--verifyrunsnpm run generate:travelandnpm run buildafter writing the final MDX.- If the target file already exists, the script refuses to overwrite by default; add
--forceonly when you truly need to overwrite. - The
outputfield in the source is only used to specify the output path and is not written into the final front matter.
Template location:
scripts/templates/travel-article-source.example.md
Copy-Item .env.example .env.local
Then fill in the AMap keys in .env.local:
AMAP_WEB_SERVICE_KEY=your-amap-web-service-key
AMAP_JSAPI_KEY=your-amap-jsapi-key
AMAP_SERVICE_HOST=
AMAP_SECURITY_JS_CODE=your-amap-security-code
Details:
scripts/generate-travel-photo-metadata.mjsautomatically reads.env.localand.env.development.localfrom the repo root- If
AMAP_WEB_SERVICE_KEYis already explicitly set in the current shell, it takes precedence over local files AMAP_WEB_SERVICE_KEYis only used by the photo metadata script;AMAP_JSAPI_KEYandAMAP_SERVICE_HOST/AMAP_SECURITY_JS_CODEare used by the frontend Travel map component- The frontend map loads via
@amap/amap-jsapi-loaderinstalled throughnpm; it no longer uses page-injectedloader.js .env.localis already ignored by.gitignore; do not commit real keys- Production prefers
AMAP_SERVICE_HOST AMAP_SECURITY_JS_CODEis only a fallback for local development or no-proxy environments- If you inject
AMAP_SECURITY_JS_CODEdirectly into the Docusaurus frontend config, it will enter the build artifacts and remain visible to clients even after server deployment - The current repo has protection: once
AMAP_SERVICE_HOSTis configured, the build no longer injectsAMAP_SECURITY_JS_CODEintocustomFields.amap
For example, in production you can set:
AMAP_SERVICE_HOST=/_AMapService
and let your own server proxy handle the actual AMap requests.
If you only upload the raw static build/ directory to a server without configuring a proxy, and you want others to load the map normally, you must continue using the frontend direct AMAP_SECURITY_JS_CODE approach. The map will work, but the security key will also be exposed in the build artifacts.
A minimal maintainable approach:
- Frontend build environment keeps only
AMAP_JSAPI_KEYandAMAP_SERVICE_HOST=/_AMapService - Server reverse-proxies
/_AMapService - The server injects the real AMap security key during proxy forwarding
For example, nginx can start with a minimal Web service proxy:
location /_AMapService/ {
  set $args "$args&jscode=your-security-code";
  proxy_pass https://restapi.amap.com/;
  proxy_set_header Host restapi.amap.com;
}
If you later enable custom map styles, add the /_AMapService/v4/map/styles proxy rule per AMap's official security documentation.
After the page content is complete, if you only want to refresh photo metadata independently:
npm run generate:travel-metadata
If you only want to refresh Travel map data independently:
npm run generate:travel-map-data
If you want to refresh both travel photo metadata and maps in one go:
npm run generate:travel
If you are only temporarily overriding local file keys for this session, you can also set them directly in the current shell:
$env:AMAP_WEB_SERVICE_KEY='your-amap-web-service-key'
npm run generate:travel-metadata
This command will:
- Scan
.mdxfiles underdocs/Travel - Extract all JPEG relative paths from
createTravelPhotos([...]) - Reuse valid metadata already in
src/data/travelPhotoMetadata.generated.json - Only download new images or images whose EXIF / GPS extraction is still incomplete
- Read the missing EXIF / GPS for these images
- Call AMap reverse geocoding for images with GPS but no reverse geocoding cache
- Automatically throttle AMap requests to no more than
3/second - Generate
src/data/travelPhotoMetadata.generated.json
If the command succeeds, you will see something like this at the end of the terminal:
Wrote N travel photo records to .../src/data/travelPhotoMetadata.generated.json (X metadata cached, Y metadata fetched, A regeo cached, B regeo requested, AMap capped at <= 3/s)
Step 5: Build Verification
The default recommendation is to run one complete verification command:
npm run verify:travel
It sequentially runs:
npm run generate:travelnpm run build
Applicable scenarios:
- Added a new travel page
- Added new photos
- Added new GPS / reverse geocoding caches
- Adjusted
TravelGalleryor photo metadata display logic
Check at least:
- The page builds successfully
- The travel page opens normally
- The lightbox opens and navigates normally
- The one-line metadata below each photo displays correctly
- On wide and narrow screens, the date and "device + lens" line-break logic is correct
AI Norms When Handling "Markdown Full of Image Links"
Going forward, when you upload a Markdown to AI and want it to complete the travel page in this repo, AI should follow this order.
1. Extract Image Relative Paths First
If the source content is:

AI should write this in the repo:
'img_for_Typora/IMG_5867_WuHan.jpg'
Not the full URL.
If the source content is:
AI should write:
'Travel/Jinan/IMG_6319_Jinan.jpg'
2. Preserve the Original Markdown's Section Structure
If the source Markdown already has:
- Headings
- Sub-headings
- Paragraphs
AI should preserve this structure as much as possible, mapping each section to a createTravelPhotos([...]) array and a <TravelGallery />.
3. Use the Title to Determine Location Copy
If the user says this is about "Wuhan," the front matter title should be something like:
title: Wuhan
Do not write only the English name, or the lightbox location copy will also display in English.
4. Do Not Fabricate EXIF Data
AI can organize page structure, but should not hand-fabricate these fields:
- Capture time
- Device model
- Lens model
- GPS
These should come from the photos themselves. If the photo metadata is already lost, accept that the lightbox will show less information, or explicitly tell the user that these images are not suitable for photography metadata display.
5. Only Read Compressed Previews
If AI needs to look at photo content, it must read compressed previews first, not originals.
Default rules:
- First tier uses a long edge of
1280px - Step up to
1920pxwhen details are unclear - Approaching
20MBoriginals or multi-image inputs must be compressed and batched first - Previews are only for judging scenes, order, groupings, and body descriptions
capturedAt,device,lens, and GPS can still only come from original JPEGs, remote stable JPEGs,exiftool, ornpm run generate:travel-metadata
6. Run a Verification Command After Generation
If the repo already has .env.local configured at the root, AI should run this by default after modifying travel files:
npm run verify:travel
Only when explicitly wanting to refresh metadata without build verification, run:
npm run generate:travel-metadata
Without running npm run verify:travel, the travel workflow is usually not considered complete.
Recommended Direct Instruction Template for Future AI
Going forward, you can give AI this instruction block along with your Markdown:
Please convert the Markdown I uploaded into a travel album page in this repo, with these requirements:
1. New file goes under docs/Travel, using MDX.
2. Front matter title: Chinese location first, then English location.
3. Front matter must include `sidebar_position: -YYYYMMDD` using the trip start date, for sorting Travel cards, sidebar, and prev/next with newest trip first.
4. Preserve the original Markdown's section structure and generate createTravelPhotos([...]) per section.
5. createTravelPhotos keeps only the relative path after `https://oss.nevergpdzy.com/`, not the full URL.
6. Use `TravelGallery` to render each image group.
7. Insert `<TravelStoryMap />` before the first `TravelGallery`, so the article page auto-reuses the default-collapsed capture point map.
8. Do not fabricate capture time, device, lens, or GPS.
9. If image reading is needed, generate compressed previews first; default long edge 1280px, step up to 1920px if needed, do not read originals directly.
10. Default to using `AMAP_WEB_SERVICE_KEY`, `AMAP_JSAPI_KEY`, `AMAP_SERVICE_HOST` / `AMAP_SECURITY_JS_CODE` from the repo root `.env.local`.
11. Run `npm run verify:travel` after making changes.
12. If photos lack valid EXIF, explicitly tell me which images are missing metadata.
13. To overwrite an existing Travel page, confirm first, then use `--force`.
The purpose of this template is to have AI directly use the implementation already in this repo, not to invent another image component or metadata structure on the fly.
Acceptance Checklist
After every new travel page, verify at least:
- Front matter has
sidebar_position: -YYYYMMDDusing the trip start date /docs/Travelcard order, Travel sidebar order, and prev/next navigation all sort newest trip first- All images in
docs/Travel/<slug>.mdxuse only the relative path afterhttps://oss.nevergpdzy.com/ - These relative paths are accessible on the remote domain
- Repo root has
.env.localconfigured with workingAMAP_WEB_SERVICE_KEY,AMAP_JSAPI_KEY,AMAP_SERVICE_HOST/AMAP_SECURITY_JS_CODE npm run verify:travelruns successfullysrc/data/travelPhotoMetadata.generated.jsoncontains the new imagessrc/data/travelMap.generated.jsonis refreshed- If
--forcewas used to overwrite an old page, confirm it overwrote the expected file and no hand-written body text was lost - Key images with GPS have
reverseGeocodeand simplifieddisplayLocationfilled in - Key images show at least
capturedAtordeviceorlens - Page builds successfully
- Location copy in the lightbox is correct
- Travel maps in the category page and article page appear correctly, and the article page map expands on button click
- Lightbox layout is correct on both mobile and desktop
Common Issues and Fixes
1. Generation Script Succeeded but Some Image Metadata Is Empty
Common causes:
- The image itself was compressed or had its EXIF stripped
- What was downloaded is not the original JPEG
- The image never had lens or time fields to begin with
Priority order:
- First use
exiftoolor a system command to check whether this JPEG still has metadata locally - Then confirm whether the remote link points to the same file
- If the remote version is not the original, re-upload the EXIF-preserving version
2. Page Location Display Is Wrong
Check these first:
src/data/travelPhotoMetadata.generated.json-- this image'sgps,reverseGeocode, anddisplayLocation- Whether the AMap reverse geocoding result was too long and was correctly simplified
- If this image has no GPS or reverse geocoding failed, check the article front matter
title
The current frontend displays location primarily from the photo GPS reverse geocoding simplified result. Only when GPS is missing or the request fails does it fall back to the article title.
3. The Same Image Reused Across Multiple Travel Pages Causes an Error
The current script checks whether the same path has been assigned different location labels by multiple travel pages. If the same image appears in two articles and the two article titles differ, the script may throw:
Conflicting location labels for ...
In this case, either:
- Do not reuse the same image across pages
- Or ensure they inherit the same location title
4. User Provided HEIC, PNG, or Links with Query Parameters
The most stable form for the current travel metadata pipeline is:
- Public JPEG
- Stable path
- Directly downloadable
If the source does not match this, first organize the assets into compliant JPEG, then enter the travel page workflow.
5. Chinese Garbled Text in PowerShell When Viewing Documents or JSON
This repo occasionally shows Chinese display issues in Windows PowerShell, but the files themselves are usually still valid UTF-8.
If this happens:
- Open the file directly in an editor to confirm
- Or use
nodeto read the UTF-8 content
Do not misjudge the document as corrupted just because the terminal displays garbled text.