Jupyter远程连接服务器指南
Jupyter Notebook不仅可以在本地使用,还能方便地用于远程连接服务器。这样,如果你有一台内存较大的服务器,但不喜欢在Linux上进行操作,可以在本地Windows上通过Notebook远程连接服务器,利用服务器的资源编写代码。
一、安装 Jupyter
最开始的时候,Jupyter指的是Jupyter Notebook,后来Jupyter公司推出了Jupyter Lab。
在命令行中输入以下命令来安装Jupyter Notebook和Jupyter Lab:
pip install notebook jupyterlab
二、设置密码
2.1 自动设置
在命令行中输入以下命令自动设置密码:
jupyter server password
系统会提示输入密码并进行验证:
Enter password:  ****
Verify password: ****
[JupyterPasswordApp] Wrote hashed password to /Users/you/.jupyter/jupyter_server_config.json
自动设置密码不需要在配置文件中配置密码。
2.2 手动设置
打开Python,输入以下语句:
from jupyter_server.auth import passwd
passwd()
系统会提示输入密码并进行验证:
Enter password:
Verify password:
'sha1:67c9e60bb8b6:9ffede0825894254b2e042ea597d771089e11aed'
手动设置需要在配置文件中配置密码。如果设置了自动密码,手动密码将不生效。
参考链接:preparing-a-hashed-password
三、生成配置文件
在命令行中输入以下命令生成配置文件:
jupyter server --generate-config
系统会提示配置文件的生成位置:
Writing default config to: /root/.jupyter/jupyter_server_config.py
四、修改配置文件
打开 jupyter_notebook_config.py 文件,修改以下内容:
c.ServerApp.allow_remote_access = True
c.ServerApp.allow_root = True
# 开启远程访问ip
c.ServerApp.ip = '*'
c.ServerApp.open_browser = False
c.ServerApp.password_required = True
# 使用自动设置密码,则此处不需要配置手动密码
c.ServerApp.password = ''
# 设置端口号
c.ServerApp.port = 9999
# notebook存储目录
c.ServerApp.notebook_dir = '/root/app/jupyter'
五、启动Jupyter
在命令行输入以下命令开启服务:
jupyter lab --allow-root
为了使Jupyter Notebook在后台运行,可以使用以下命令:
nohup jupyter notebook --allow-root >/dev/null 2>&1 &
同理,启动Jupyter Lab可以输入以下命令:
nohup jupyter lab --allow-root >/dev/null 2>&1 &
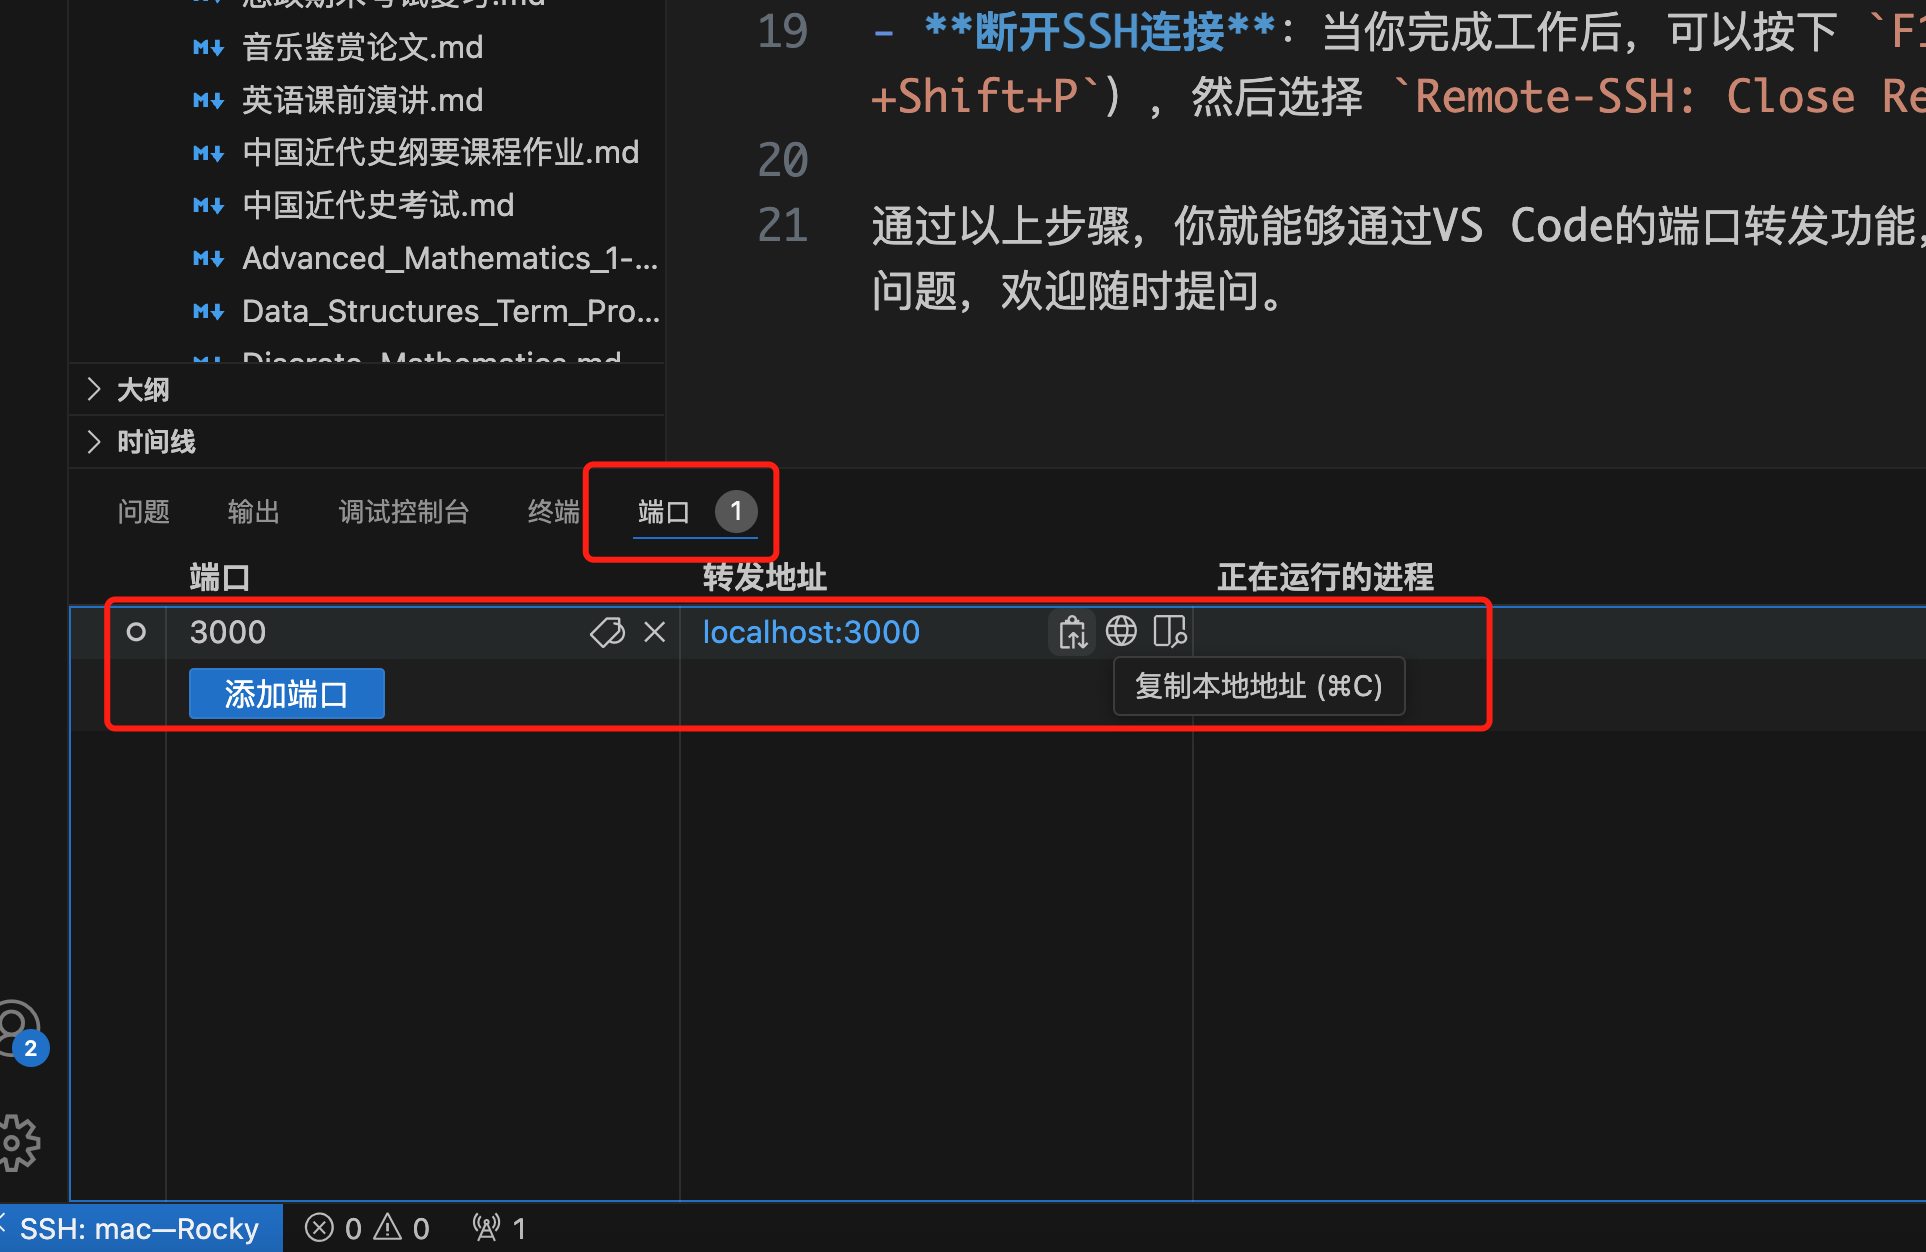
端口转发 vscode_Port_Forward
直接在终端旁边的端口那里添加端��口转发,填写远端服务端口,会转发到localhost相同的端口

使用localhost+端口号进行访问就可以